The Crash Photo Checklist for Dangerous Road Wrecks: What to Capture Before Cars Move
After a serious wreck, you need to grab clear photos—fast—before anything gets shifted around. Wide shots of the whole scene, vehicle positions, close-ups of damage, license plates, skid marks, road signs, and any visible injuries—these are the images that’ll matter most for insurance or legal fights down the line.
Here’s what you should snap right away, plus a few supporting details to jot down so you don’t miss something that could end up being crucial. If there are injuries or folks arguing about who’s at fault, you might want to get a car wreck lawyer involved early for advice.
Critical Photos to Capture Immediately After a Crash
Focus on photos that nail down where everything happened, how the vehicles landed, what’s damaged, and who’s involved. Start with wide shots, get the exact resting spots of the vehicles before anyone moves them, zoom in on damage, and make sure you get clear shots of plates and VINs.
Wide Shots of the Crash Scene
Begin with at least three wide photos from different spots—one from each end of the road, and if you can, one from higher up. Try to include traffic lights, road paint, intersections, driveways, and whatever the weather or lighting was doing at that moment.
Think of it like a grid: left, center, right. Get sidewalks, barriers, curb heights, and any crosswalks or signs that could matter for figuring out what happened. If you can, timestamp your photos or at least note the time, so the order of events is clear.
If there are other cars, ambulances, or a crowd nearby, include them too—it shows what the scene was really like and what people could see. Keep your hands steady and avoid using digital zoom for these; you want the big picture, not a blurry mess.
Vehicle Positions Before Movement
Take photos of each car from a few different spots, but don’t touch or move anything. At a minimum, get four shots per car: front, back, each side, and maybe one at an angle to show how it’s sitting and where the wheels are pointing.
Show which way the tires are turned, if airbags went off, if doors are open, or if there’s a trailer. If you spot skid marks or a smashed headlight on one side, try to get both the damage and how the car is sitting in the same frame.
If you’ve got a ruler or something for scale, toss it in the shot to show how far apart things are or how close to the curb a car ended up. These photos are your proof before police or tow trucks move anything around.
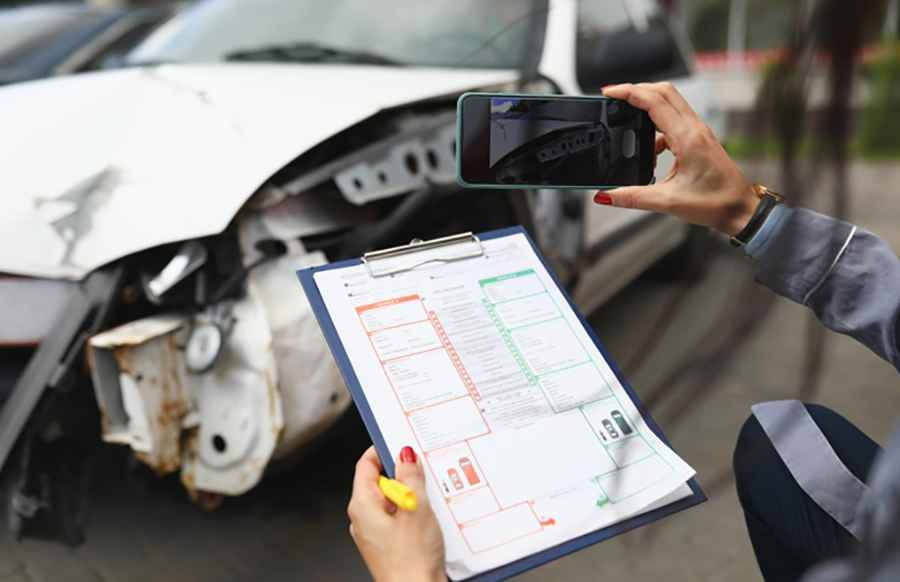
Close-Ups of Damage and Impact Points
Zoom in on all the damaged spots—take a bunch of close-ups from different angles and distances. Get the scrapes, dents, broken glass, paint streaks, bent bolts, and where bumpers or lights got ripped off.
If you can see inside through an open hood or trunk, snap any damage there too. Did someone’s stuff fly around or get tossed out? Photograph that as well. Use your phone’s portrait or macro mode for details, and a wider shot for context.
If your phone lets you, label the photos on the spot (like “Driver-side bumper, 10:24 AM”) so you know later which shot goes with what. The more detail, the better—it’ll help with timelines and repair quotes.
License Plates and VIN Documentation
Get a clear, straight-on photo of every car’s license plate from about 3–6 feet away, making sure the numbers and state are easy to read. Take a second shot from a slight angle just in case glare messes up the first one.
Find and photograph the VINs—usually on the dashboard, the driver’s door, or in the engine bay. Zoom in so the whole number is easy to see. If you can’t get to the VIN, take a photo of the spot and make a note about what’s blocking it.
If people are swapping registration or insurance info, snap that too (with permission). Back these ID shots up right away—cloud, email, whatever—so you don’t lose them. You’ll need them for claims and reports later.
Supporting Evidence and Legal Considerations
Whoever’s taking photos should look for clues on the road, visible injuries, and anything (or anyone) that could help piece together what happened. Timestamps, different angles, and notes about who took which photo all add to the evidence.
Road Conditions, Traffic Signs, and Environment
Take pictures of potholes, skid marks, debris, and any fluids on the ground. Get shots of lane lines, crosswalks, curb shapes, and where the cars ended up in relation to those. Mix up wide and close shots so you can see both the big picture and the details.
Don’t forget traffic controls: shoot signals from every direction, stop or yield signs, and any temporary cones or work-zone signs. If there’s anything blocking the view—big trucks, bushes, billboards, blinding sun—get that in the frame too. Jot down the time, weather, and lighting for each shot if you can.
If there’s roadwork or city maintenance nearby, photograph any detour signs, warnings, or missing/broken signals. Sometimes that stuff affects who’s responsible, and a car accident lawyer will want to see it if there’s a municipal angle.
Photographing Injuries and Personal Effects
If there are visible injuries, take close-up photos from a few angles and distances, with decent lighting and a plain background if possible. Get these shots as soon as you can, and again over the next few days to show how things change—bruises, swelling, whatever.
Snap pictures of torn clothing, shoes, helmet scuffs, seatbelt marks, and any airbags that went off. If someone’s stuff (phone, purse, medicine) got tossed around, photograph it where it landed, maybe with a ruler for scale. Keep any medical records or visit notes linked to these photos, and label each with the date and who took it.
Be careful—only take sensitive photos with permission, and store them somewhere safe. If you end up working with a car accident lawyer, they’ll want everything organized, with timestamps, to help prove what happened and what damages there are.
Documenting Witnesses and Surveillance Opportunities
Jot down each witness’s full name and phone number, plus a brief statement in their own words about what they saw—don’t just paraphrase if you can help it. If they’re okay with it, snap a photo of the witness; if not, maybe just grab a shot of their car or the exact spot where they were standing. It helps to note their vantage point in relation to the crash, whether that’s a quick sketch on your notepad or a couple of extra photos from their perspective.
Take a look around for any businesses, homes, or traffic cameras that might’ve caught the incident. Snap pictures of building fronts, any visible security cameras, or even dash-cam stickers on cars nearby (you’d be surprised how often that pays off). Jot down the names of businesses and grab contact info—you might need to ask them to hang onto footage sooner rather than later.
Keep all your witness details and surveillance photos organized, with timestamps and metadata if you can swing it. These little bits make life a lot easier for a car accident lawyer trying to subpoena footage or back up a witness’s account if things go to a claim or, worse, a lawsuit.