Transforming Grainy Road Trip Clips into 4K Cinematic Experiences
You finally get home after a road trip. You plug in your phone, pull up the footage, and the excitement fades fast. The highway shots are blurry. The sunset you filmed through the windshield looks washed out. The spontaneous moment at the rest stop? Grainy and dark.
Almost everyone goes through it. Phone cameras have trouble with motion, low light, and glare from glass. But that doesn't mean the video is ruined. Using tools like Vmake, you can clean up those messy clips and make them into sharp, polished videos that look more like movies. This is how to really do it.
Using Vmake for Enhancement
Not every creator wants to invest in expensive editing software. That is where simple AI tools become useful.
Vmake offers a practical option for improving video quality quickly. Try this free video enhancer to upgrade raw travel clips without advanced editing skills.
It runs right in your browser so there’s nothing to set up or install. You upload a clip, enhance it and download the enhanced version.
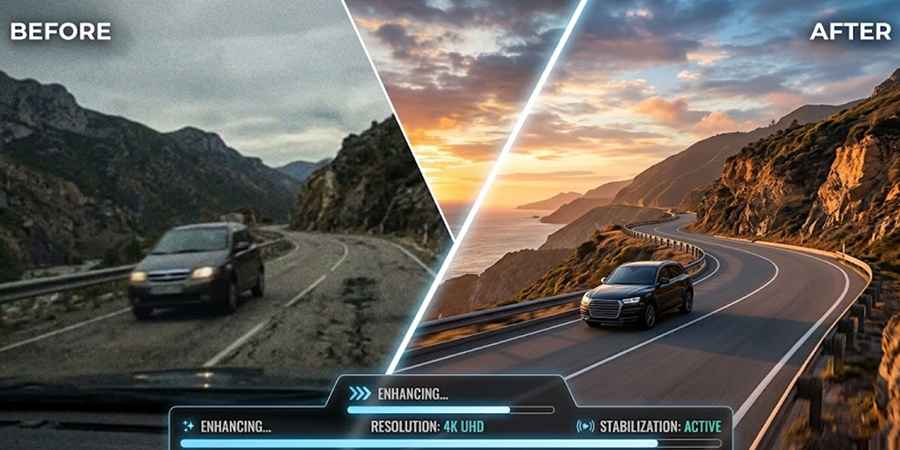
Here’s what it does to travel clips:
- Upscales low-resolution footage
- Reduces blur caused by movement
- Improves lighting in dark areas
- Sharpens textures like roads, skies, and landscapes
- Stabilizes visual noise in shaky clips
The result feels more like a filmed sequence rather than a casual recording.
The Enhancement Process, Step by Step
Step 1:Upload Grainy Road Trip Clip to Vmake
![]()
Just drag & drop your grainy video from the road trip, paste a URL link or choose the option to import video from gallery. Vmake supports common formats like MP4, MOV, M4V, 3GP and AVI.
For best results, choose a clip with clear visuals and natural movement. Keep it in its original form without editing or heavy compression. This gives the tool more detail to work with when creating a sharper 4K version.
In case the source clip is of poor quality or appears blurred, you will need to perform upscaling through video upscaler before applying the enhancement feature. This helps prepare it for smoother editing later.
If you have multiple videos from the same trip, upload them together. Vmake allows batch processing. So you can queue several clips at once and run them in a single session. This works well for full travel days, vlog footage, or scattered scenes from different stops.
Step 2: Use AI Enhancement
![]()
After uploading, choose the enhancement model based on the type of footage. This step has a big impact on the final result.
Vmake offers different modes designed for specific situations:
- Portrait mode — for clips where people are the focus
- Low-light mode — for dawn, dusk, or night driving footage
- Standard 4K — for general scenery and highway shots
- AI 4K+ — for heavily compressed or very soft clips that need the most reconstruction
Using the wrong model on the wrong footage can make things look over-processed. Match the model to the clip type.
Once the upload has been completed, then AI starts the analysis. Unlike filters that merely enhance edges, AI looks for certain textures, such as road texture, leaf textures, and reconstructs the missing pixels.
It provides the balance between contrast and noise reduction at all times. This works best with night pictures from the highways because the shadows usually appear muddy. The whole procedure is automated. Hence, there is no need to alter any bit rates or the noise reduction sliders for professional performance.
Step 3: Check & Export
![]()
Once processing is complete, take time to review each clip before downloading.
AI enhancement can sometimes push details too far. This may show up as:
- Over-sharpened facial features
- Slight halo effects around objects
- Extra noise reduction in very dark areas
- Unnatural texture on fast-moving scenes
A quick preview allows you to identify these issues early. If something doesn't look right, adjust the settings and re-render the clip before exporting.
This step ensures your final footage is clean and good to go for editing. So you don’t run into any unexpected problems later on in your timeline.
What "4K Cinematic" Actually Means
People throw around "cinematic" loosely. For road trip footage specifically, it means a few concrete things:
Element | What It Looks Like in Raw Footage | What It Looks Like Enhanced |
Resolution | 720p or soft 1080p | Sharp 2K or 4K with fine detail |
Color | Flat, washed out, or yellowish | Balanced contrast, natural tones |
Grain/Noise | Visible, especially in shadows | Suppressed without looking plastic |
Motion | Smeared or choppy | Smooth, stable, clean edges |
Texture | Lost in compression | Reconstructed — roads, trees, skin |
Getting from column two to column three used to require expensive software and hours of manual work. AI enhancement has changed that significantly.
The Editing Step: Making It Feel Cinematic
![]()
Enhancement handles technical quality. The cinematic feeling comes from editing decisions.
A few things that make a big difference:
- Framing & Composition: Don’t allow the dash or window frame to intrude into the landscape. Crop the image to emphasize the leading lines created by the road itself, drawing viewers into your adventure.
- Color Grading: In spite of all the enhanced videos, color grading is essential for storytelling. Choose warm colors for your trips across the deserts and cooler, moodier hues for mountain passes.
- Pacing & Rhythm: The cinematic video moves at a certain rhythm. Combine dynamic shots of scenery with still shots of the destination while syncing everything up with a beat.
This is what everyone overlooks. People throw their clips onto the timeline and just add a music track. But the edit is the key to making a video cinematic.
Common Mistakes to Avoid
- Over-enhancing. If AI 4K+ makes your footage look artificial, step down to standard 4K.
- Enhancing vertical clips for horizontal timelines. Decide your aspect ratio before you enhance.
- Ignoring audio. Cinematic visuals with road noise in the background undercut everything.
- Using too many transitions. Cuts are cleaner than wipes or zooms for this style.
What to Realistically Expect
AI technology for video enhancement is amazing. However, it doesn't make impossible footage good. Overly underexposed footage, videos recorded with extremely slow fps, and corrupted files can remain bad after being improved by an AI enhancement program. The program performs great when it is applied to footage that has at least something to work with – decent composition, normal lighting, and footage that wasn't recompressed too much.
For example, enhancing 480p footage captured in low light conditions while the vehicle was moving at high speed might turn out impossible with AI help. Nevertheless, footage that simply lacks sharpness, color depth, and looks slightly grainy can be greatly enhanced.